Last updated October 15, 2026
Room Addition Contractor Maintenance Checklist for San Jose Homeowners
Most room additions don’t fail because they were built wrong. They fail because nobody handed the homeowner a written maintenance schedule after the final inspection, and small problems that cost $200 to fix in month three become $4,000 repairs by month eighteen. In San Jose, the pattern is predictable: a hot, dry summer opens hairline gaps in caulk and sealant, then the first atmospheric river of November drives water into those gaps before you ever see a stain on the ceiling. This guide is the checklist most room addition contractors never provide, written for the way San Jose’s climate actually behaves. You’ll learn what to inspect, when to inspect it, what your permit drawings can tell you, and which problems remain the builder’s responsibility.
Quick Answer
A room addition maintenance checklist for San Jose homeowners should follow a month-by-month schedule: inspect exterior sealant joints, flashing, paint, and drainage at 30, 90, and 180 days after final inspection, then every fall before the rainy season. The highest-failure points in San Jose are roof-to-wall transitions, window and door perimeter sealant, and any joint where your new framing meets the original house, because our dry summers shrink the materials and our wet winters exploit the gaps. Most first-year issues fall under the contractor’s written guarantee, provided that guarantee actually names workmanship defects, so request a copy of the warranty terms in writing before you close out the project.
Table of Contents
- Month-by-Month First-Year Checklist After Final Inspection
- High-Failure Points Specific to Santa Clara County’s Climate
- How to Read Your Permitted Drawings to Find Utility Tie-Ins
- What a Written One-Year Guarantee Should Actually Cover
- Contractor Responsibility vs. Homeowner Upkeep: Three Signs
- Seasonal Maintenance for Years Two Through Ten
- Common Mistakes to Avoid
- When to Call a Professional
- Frequently Asked Questions
- The Bottom Line
Month-by-Month First-Year Checklist After Final Inspection
The day San Jose signs off on your final inspection is not the day your responsibility starts. It’s the day your observation period starts. Here is the schedule we hand to every homeowner who builds with us, written for a climate where summer temperatures regularly hit 90°F and winter storms arrive fast.
Day 0: The Handoff Walk
Before your contractor leaves the site for the last time, walk the entire addition with your permit set in hand. Confirm three things: every window and door opens and locks without binding, every electrical outlet works with a simple plug tester, and you have physical copies of your signed permit card, warranty document, and a list of every subcontractor who touched the job. If the contractor cannot produce a written warranty on the spot, do not make the final payment.
Month 1: Sealant and Caulk Check
New construction settles. Materials that were tight on day one can open a 1/16-inch gap by week four. Inspect every exterior caulk joint: where siding meets window trim, where the new roof meets the existing roofline, and where the addition wall meets the original house. Run a finger along each joint. If you feel a break, photograph it and call the contractor. This is a workmanship defect, not a maintenance issue.
Month 3: The 90-Day Flashing Inspection
The most common warranty call we see is a flashing joint that dried out before the first rainy season because no one told the homeowner to look at it. At 90 days, check your roof-to-wall flashing, kickout flashing at any sidewall-roof intersection, and the drip edge along every eave. If you do not know what you are looking for, have your room addition contractor in San Jose return for a 90-day walkthrough. A reputable builder will do this without charging you a trip fee.
Month 6: Weatherproofing and Drainage Check
By late October in San Jose, the first rain is close. Clean every gutter and downspout that crosses your new roofline. Confirm that downspout extensions move water at least five feet from the foundation. Check crawlspace or slab perimeter vents for blocked airflow. If your addition is slab-on-grade, verify the soil around the foundation still slopes away at least six inches over the first ten feet. A room addition with poor drainage will show foundation cracks within two years.
Month 12: The One-Year Comprehensive Review
One month before your written guarantee expires, document everything again. Take photos of every exterior joint, every ceiling corner, every door threshold. Test every GFCI outlet. Look for nail pops in drywall, which are common in San Jose because our dry summers shrink framing lumber more than contractors expect. If anything looks questionable, file a warranty claim before the 365-day mark passes. Fielding ADU San Jose takes this seriously because our own written guarantee runs a full year, and we do not want anything hiding until day 366. For seasonal ADU care in San Jose, see our year-round homeowner’s guide.
- Confirm all windows and doors operate cleanly at lock and latch points
- Inspect exterior sealant, caulk, and flashing at 30, 90, and 180 days
- Clean gutters before first rain; verify downspout extensions divert water 5+ feet
- Test every GFCI outlet with the test and reset buttons
- Photograph all exterior joints at month 12 for your records
High-Failure Points Specific to Santa Clara County’s Climate
San Jose is not San Diego and it is not Seattle. We get roughly 15 inches of rain a year, almost all of it between November and March, and we get summer heat that pushes framing lumber past 120°F on south-facing walls. That combination, long dry heat followed by concentrated wet, creates specific failure patterns that a contractor from a coastal climate may not anticipate.
The Original House-to-Addition Seam
Where your new room addition meets the original exterior wall, you have two different structures that were framed at two different times with two different moisture content levels in the lumber. The original house has been drying for decades. The new addition started drying the day the roof went on. They move at different rates. The seam between them, whether it’s a roofline tie-in or a wall intersection, is the single most common leak point in San Jose room additions. You should inspect this seam after every heavy rain for at least the first two winters.
South and West-Facing Sealant Joints
Sealant fails from ultraviolet exposure as much as from movement. In San Jose, a south-facing window perimeter gets more UV hours per year than any other orientation. The sealant around south and west windows can chalk, crack, and pull away within 18 months. This is not a defect in the workmanship; it is our climate doing what our climate does. But it is a defect if nobody told you to check it. When the sealant fails, water can run down the rough opening and rot the framing without ever showing a stain indoors.
Roof-to-Wall Intersections on Flat and Low-Slope Roofs
Many San Jose additions use low-slope roofs because they are cheaper and easier to permit. Low-slope roofs drain slower, which means water sits longer at any flashing transition. The roof-to-wall flashing on a low-slope roof is under more hydrostatic pressure than the same flashing on a 6:12 pitch. If your addition has a flat or low-slope roof, inspect the flashing twice a year, not once, and after any storm that drops more than an inch of rain in a day.
James Hardie Siding Joints
James Hardie fiber cement siding handles San Jose’s heat remarkably well, but it still moves. The factory-recommended joint gap between boards is 1/8 inch, and in our climate, that gap matters because the boards expand slightly during our wet winters where humidity can spike after months of single-digit humidity. If joints were butted too tight during installation, you will see cracking at the joint lines within the first year. This is a workmanship issue, not a product issue. A written warranty should cover it.
How to Read Your Permitted Drawings to Find Utility Tie-Ins
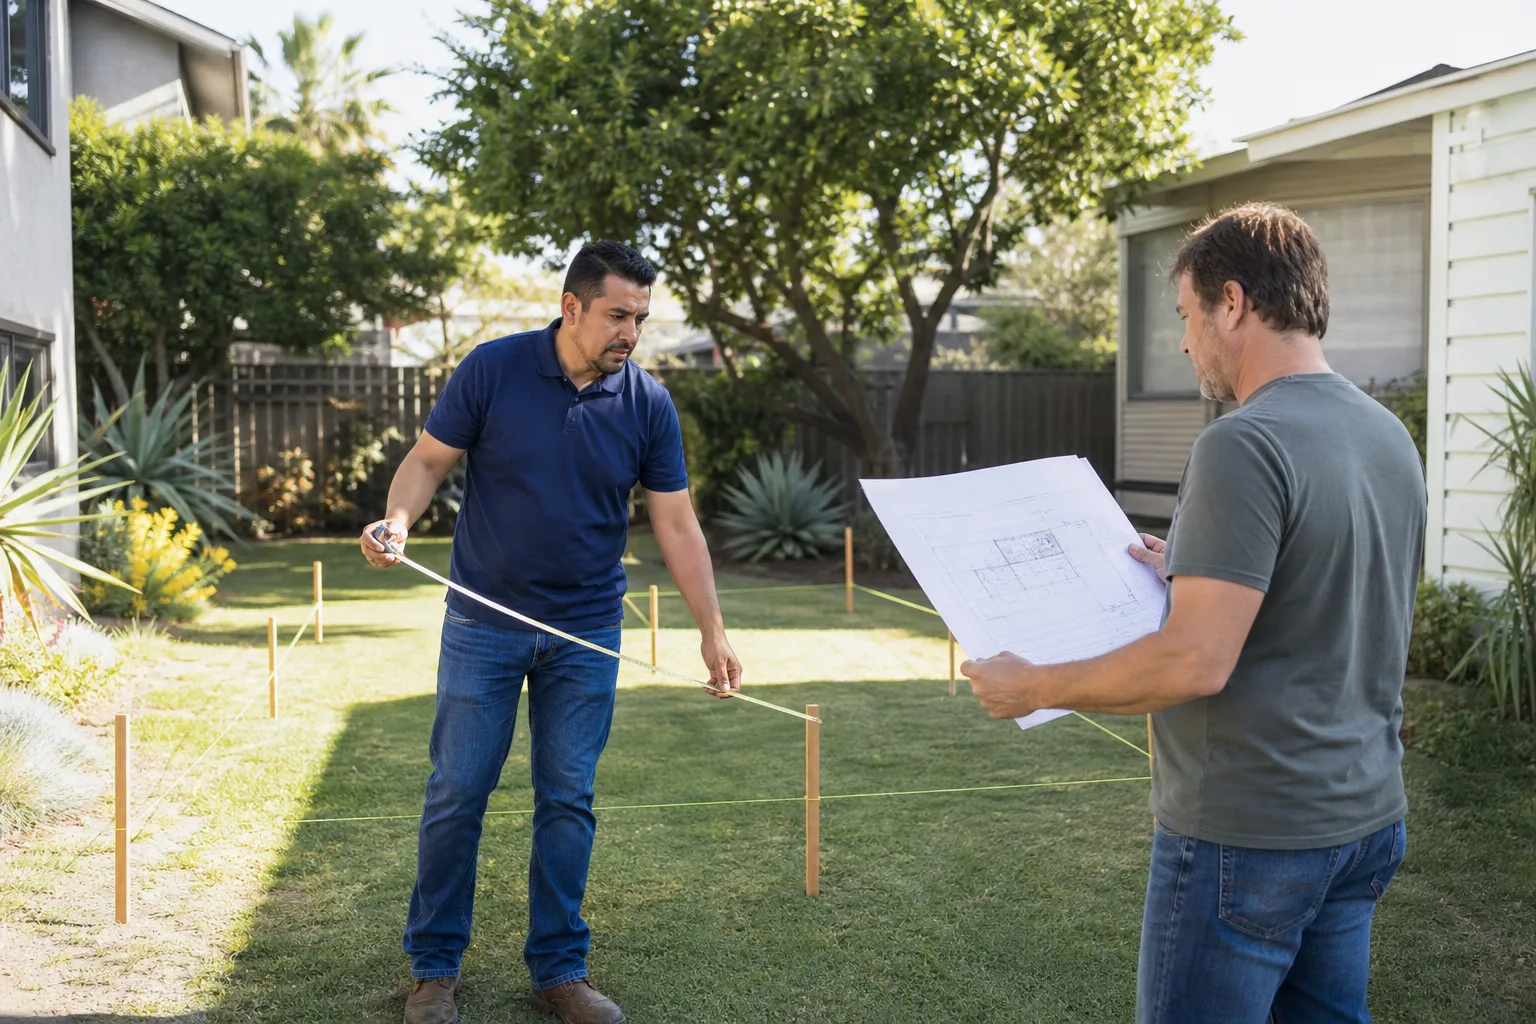
Your permitted plan set is not a decoration. It is the single most useful maintenance document you own, and most homeowners never open it after the permit closes. Here is how to use it to locate the connections that need periodic inspection.
Start with the Site Plan
The site plan shows your property from above, including the addition’s footprint, the new roofline, and the path of any new underground utilities. Look for dashed lines labeled with abbreviations like “W” for water, “S” for sewer, “E” for electrical, and “G” for gas. Trace each dashed line from the street or the original house to where it enters your addition. Those entry points are where you check for leaks, settling, or exposed conduit after the first wet season.
Find the Mechanical and Electrical Pages
Your mechanical plan shows the routing for HVAC ducts and any new gas line for a range, dryer, or tankless water heater. Your electrical plan shows the panel schedule and every circuit added to the room. Note which breaker number controls the addition. When you test GFCIs, test the entire addition, not just one outlet. If a breaker trips, know which one to look for before you open the panel.
Look for the Detail Sheets
Permit sets include detail drawings, typically at the back, showing specific connections: how the new foundation ties to the old, how the roof flashing is configured, how the siding terminates at the ground. These are the drawings the inspector signed off on. If a connection on site does not match the detail sheet, that is a defect worth a call. A responsible contractor builds to the approved detail. A less responsible one builds to whatever is fastest and hopes nobody checks.
Using your drawings this way takes fifteen minutes. Do it once when you get the permit set back, and again at the one-year mark. If you are not sure how to read a particular page, a garage conversion contractor in San Jose who works from permits every week can walk you through it without charging a design fee. We do this for our clients because a homeowner who understands their drawings is one who catches small problems before they become warranty claims.
Where Tie-Ins Typically Hide Problems
- Exterior electrical conduit penetrations where sealant has pulled away
- Gas line risers where the pipe exits the ground near the foundation
- Hose bibs on new exterior walls that were not winterized before a freeze
- Roof penetrations for plumbing vents where the rubber boot has cracked
What a Written One-Year Guarantee Should Actually Cover
Not all warranty language is created equal. Most contractors in San Jose give you a page that sounds protective but is written to do one thing: get them out of the conversation. Here is what a real written guarantee should say, and what the weak language looks like.
Strong Language vs. Weak Language
A strong guarantee names the covered items in plain English: workmanship defects in framing, drywall, flooring, tile, roofing, siding, painting, plumbing, and electrical for a defined period. It names what the contractor will do if something fails: return at no charge, diagnose the issue, and correct the defect. It includes a specific duration, usually one full year from final inspection. It is signed by a principal of the company, not a project manager who has already moved to the next job.
Weak language uses phrases like “we warrant against defects in materials and workmanship for a period of one year from substantial completion per applicable law.” That sentence means almost nothing actionable. “Substantial completion” is a legal term that can be argued. “Per applicable law” just means whatever California Civil Code already requires. It adds nothing. If your warranty document is one page of dense legal text with no specific examples and no signature from an actual human, you have been handed a legal shield, not a guarantee.
Our own standard is the Garrison Standard: a written price before work starts, a written one-year guarantee that names what it covers in plain language, and a no-charge return visit if something fails inside that year. We put that in writing because a guarantee you cannot enforce is just a sentence. The 365-Day Done Right Promise is the same language we use with the ADU builders in San Jose who work under the Garrison Partners umbrella, and it applies to room additions the same way.
What California Law Already Requires
California requires contractors to provide a one-year fit-and-finish warranty on new construction under the Right to Repair Act, formally known as SB 800. That law sets baseline standards for construction defect claims. What it does not do is make the contractor easy to reach, responsive, or willing to come back without a fight. A written guarantee that names specific coverage is still worth more than the statutory minimum because it removes the argument. The strongest documents in our industry combine the legal requirement with plain-language specifics and a direct phone number.
Contractor Responsibility vs. Homeowner Upkeep: Three Signs
The most common argument after a room addition is finished is not about whether something failed. It is about whose job it was to prevent the failure. Here is how to tell the difference quickly.
Sign One: The Failure Is at a Connection, Not a Surface
If water is coming in around a window, and the caulk joint has separated from the window frame in a straight, uniform line, that is a workmanship issue. The contractor either applied the sealant to a dirty surface, used a sealant not rated for that substrate, or did not tool the joint properly. If water is coming in around the same window, but the caulk is intact and the water is running down the interior of the glass, that is a condensation issue related to indoor humidity, which is homeowner maintenance. Connection failures are generally contractor issues in the first year.
Sign Two: The Failure Happened Within the Guarantee Period and Was Reported
A workmanship defect that appears at month eight but is not reported until month fourteen is still technically a defect, but you have made it harder to win the claim. Report issues when you see them, in writing, with photos, before the guarantee expires. If the contractor ignores a written notice sent before the 365-day mark and the problem worsens after, that is still their issue. If you waited until month fourteen because you were busy, every contractor in San Jose will argue the issue emerged after the warranty period, and some will be right.
Sign Three: The Problem Is Caused by Deferred Maintenance, Not Building Defects
Clogged gutters that overflow and cause fascia rot are a homeowner issue. You own the gutters. A roof that leaks at a properly installed flashing joint because tree debris has piled up against the flashing and held water for months is a maintenance issue. A roof that leaks because the flashing was not lapped correctly on day one is a contractor issue. The distinction is this: did the failure originate in how the piece was built, or in how the piece was maintained?
If you are not sure which category applies, take photos and send them to your contractor. A reputable builder in San Jose will tell you plainly whether it is theirs to fix or yours to maintain. That honesty is part of what you are paying for when you hire a builder who prices work honestly and stands behind it.
Seasonal Maintenance for Years Two Through Ten
After your written one-year guarantee expires, the maintenance shifts from warranty enforcement to routine upkeep. Follow this seasonal rhythm and a properly built room addition in San Jose will last fifty years without major intervention.
Fall (September and October)
Clean all gutters and downspouts. Check the roof for cracked sealant at penetrations. Clear any debris from roof-to-wall intersections where your addition meets the original roofline. Inspect weepholes in brick or veneer, if present, to confirm they are open. Test every window for smooth operation before the rainy season makes them wet and swollen. Caulk any joint that has opened more than 1/16 inch.
Winter (November through February)
After any storm that produces more than two inches of rain in 24 hours, walk the addition interior and check ceiling corners, window sills, and baseboards for moisture. Check the crawlspace or slab perimeter for standing water. Run the bathroom exhaust fan during and after showers to keep indoor humidity below 60 percent. San Jose winters are not harsh, but the humidity spike in a poorly ventilated addition will show up as mold on ceiling drywall within a season.
Spring (March and April)
Inspect the exterior paint. San Jose’s dry heat causes paint to chalk and crack faster on south and west walls. Touch up any bare spots before summer sun gets to the substrate. Check exterior door weatherstripping for compression set. Lubricate door hinges and window tracks. Look for insect activity, especially termites, which are active in the Bay Area starting in March. Termites follow moisture and wood-to-soil contact, so keep soil and mulch at least six inches below any siding.
Summer (May through August)
This is the inspection season, because dry conditions reveal movement that moisture hides. Walk every exterior wall and look for new cracks in stucco, joints opening in siding, or caulk pulling away from trim. Check for nail pops indoors, especially on ceilings, which appear when framing lumber shrinks. Clean or replace HVAC filters monthly during heavy AC use. And if you have a tankless water heater in the addition, flush it once a summer to remove mineral buildup from San Jose’s hard water.
Common Mistakes to Avoid
- Making final payment without a written warranty in hand. Once the money clears, your leverage disappears. Get the warranty document signed and copied before the final check.
- Assuming the inspector will catch everything. San Jose inspectors verify code compliance at the moment of inspection. They do not inspect sealant joints for long-term durability. That is your job after day one.
- Ignoring the 90-day flashing check because “it looks fine.” Flashing failures are invisible from the ground level. You need a ladder, a bright light, and ten minutes at the roof-to-wall transition.
- Applying caulk over failed caulk. Caulk does not adhere to caulk. If a joint has failed, scrape it out completely, clean the surfaces, and reapply. Otherwise, you have created a cosmetic patch that will fail again within months.
- Waiting until the first big storm to test drainage. By the time water is running down an interior wall, the damage inside the wall cavity is already done. Test your drainage in October, not December.
- Losing the permit set after the project ends. Your drawings are the maintenance manual for your addition. If you lose them, request a copy from the contractor or the City of San Jose building department before you need them.
When to Call a Professional
Some issues you can handle with a tube of caulk and an afternoon. Others need a contractor who can diagnose the root cause before you spend money on the wrong fix. Call a professional if you see water stains on the ceiling that grow after rain, cracks in the foundation or drywall wider than 1/8 inch, a floor that feels soft or spongy underfoot, or any electrical issue that trips a breaker twice in a week. These are structural or systemic signals, not surface noise. If your original contractor is not responsive, Fielding ADU San Jose offers free estimates for room addition repairs and maintenance assessments throughout San Jose. See our ADU cost breakdown for San Jose homeowners to plan your 2026 budget. Call (669) 201-3984 and a live person will answer, any hour of the day or night.
Frequently Asked Questions
For a properly built room addition in San Jose, plan on $300 to $600 per year in maintenance if you do the work yourself, covering caulk, paint touch-ups, HVAC filters, and gutter cleaning. If you hire out gutter cleaning and a twice-yearly professional inspection, plan on $800 to $1,200 annually. The first year should cost less, because most sealant and flashing issues fall under the contractor’s written guarantee.
A room addition built to current California code with proper flashing, drainage, and foundation work will last 50 years or more as a structure, with routine surface maintenance every 5 to 10 years for paint, roofing, and sealant. The systems inside, like HVAC equipment and water heaters, will need replacement on their own schedules, typically 10 to 15 years. San Jose’s dry climate is actually hard on exterior sealant, so budget for exterior re-sealing every 3 to 5 years on south and west exposures.
A legitimate written guarantee should cover workmanship defects in framing, drywall, flooring, tile, roofing, siding, painting, plumbing, and electrical work for a full year from final inspection, and it should state in plain language that the contractor will return at no charge to correct any covered defect. The Garrison Standard, which Fielding ADU San Jose follows, covers workmanship defects for 365 days with a no-charge return visit. Weak warranty language hides behind “substantial completion” and “per applicable law” without naming specific remedies.
Yes, any room addition that adds square footage to your home in San Jose requires a building permit, and most additions also require planning review for setbacks and height limits. Unpermitted additions create problems when you sell the house, refinance, or file an insurance claim. A reputable room addition contractor in San Jose pulls permits by the book and passes inspections before handoff. Call (669) 201-3984 if you are unsure whether your project needs one.
Check the City of San Jose’s online permit portal for permits matching your address, or look for the green inspection card that should have been posted at the job site during construction. If no permit record exists for the addition, it was built illegally. The original owner may not have known, but unpermitted work is still a liability when you sell. Some unpermitted additions can be legalized through the city’s retroactive permit process, but it requires opening up walls and bringing everything to current code.
Reseal exterior joints every 3 to 5 years on north and east exposures, and every 2 to 3 years on south and west exposures, because San Jose’s UV load breaks down sealant faster on those orientations. Use a high-quality exterior sealant rated for the specific substrates, and always remove old sealant completely before applying new. If you see caulk pulling away at the window perimeter before the 3-year mark, have a contractor inspect the joint to rule out framing movement.
The Bottom Line
A room addition in San Jose is a six-figure investment that deserves a fifteen-minute monthly checkup. The first year after final inspection is the critical window, because that is when workmanship defects reveal themselves while your written guarantee still applies. Inspect your flashing at 90 days, your sealant after every heavy rain, and everything at the one-year mark before the warranty expires. Learn to read your permit drawings so you know where your utilities enter the building and which connections need watching. And if your contractor did not hand you a written maintenance checklist at handoff, that is a signal in itself. The builders who care about the next twenty years are the ones who tell you what to look for. Fielding ADU San Jose does exactly that, and if you need a review or a repair, call (669) 201-3984 for a free estimate. The home page for Fielding ADU San Jose has the full scope of what we build, and we’re happy to walk you through any of it.
Written by Reed Calloway, Owner at Fielding ADU San Jose, serving San Jose since 2006. Explore more guides & resources on our blog.